This post is about making a brush holder out of… a mug! I got the idea watching Pursebuzz‘s
video on a cute, pink, over-sized cup with attached saucer made out of
iron. It was very big though, so she had to put a smaller cup in the
middle with the actual brushes in it. It looks like it’s an outside
decor item but it’s very creative to use it that way!
So I came up with an idea that would be perfect to add to the two
gifts I was giving to my sister and boyfriend’s sister (who’s birthdays
were coming up). I had bought my bf’s sister a bunch of Real Technique brushes
(love them!) and my sister brushes/makeup I knew she would like (Milani
Liquify Eyeliner, Covergirl Lash Blast original mascara (her fav),
Ecotools brushes, ELF brushes, and a few other things I can’t remember).
I decided to head to the Dollar Tree to see if they had a glass or
mug that I could decoupage. I have decoupaged other items as gifts and
had tons of different colored tissue paper left over. I was looking for
something that would be tall enough for long brushes but not too tall to
fit the smaller travel sized/eye brushes. It also had to have a large
enough rim but again, not TOO large like one of those big round
cappuccino cups. This was probably the most challenging part of the
whole project.
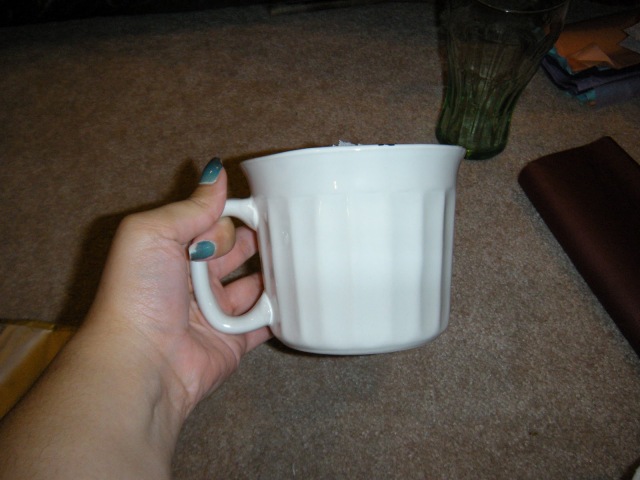
I finally narrowed my choice down to a shorter ceramic mug or a
brandy type glass. In the end I chose the mug because I liked that it
had a handle and grooves along the side.

Dollar Tree mug!
Here are all the supplies I used and where I got them.


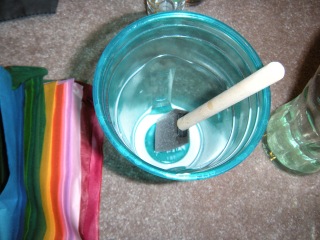
Mod Podge mixed with some water in a plastic cup
- mod podge and sponge came in a pack at AC Moore – I used a mixture of the mod podge with water in a plastic cup.
- A stack of tissue paper which I got from AC Moore for pretty cheap as well a while back.
- Two ribbons (a yellow and a silver) at AC Moore on sale for 50 cents each!
- Mug and main tissue paper for the outside I got from the Dollar Tree.
- I used a sparkly white tissue paper I received in one of my Birchboxes mixed with black on the inside.
- Glue gun I bought at Walmart for around $10.
I decided the theme I would go for was yellow and gray. I think the
combination is very classy/elegant and would match any
bathroom/vanity/decor. At first I pictured making the mug gray and with
yellow trim, but I found the perfect tissue paper at the dollar store
that was the exact style I was going for!


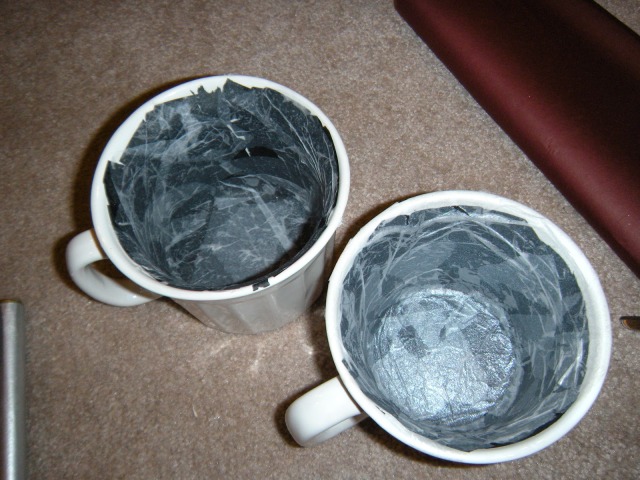
I started with the inside of the mug. I originally wanted it to be gray inside (after finding this cute paper for the outside) but did not have gray tissue paper and could not find it at the store. So, I tried to put black paper first and then the sparkly white. It didn’t come out gray but I liked the effect anyway.
One layer of black and one layer of white (still wet):

Mugs with black tissue paper and then the shiny/glittery white tissue paper on top
After a few more layers of white, the finished inside:


After letting them dry completely (you can use a hairdryer in between
layers), I started on the outside. For the outside I chose a pastel
yellow (rather than a bright yellow) to go underneath the patterned
tissue paper. I was afraid the bright one would show through too much
and I’m glad I did the pastel because it was just the subtle effect I
was going for, came out perfect.
One layer of pastel yellow:


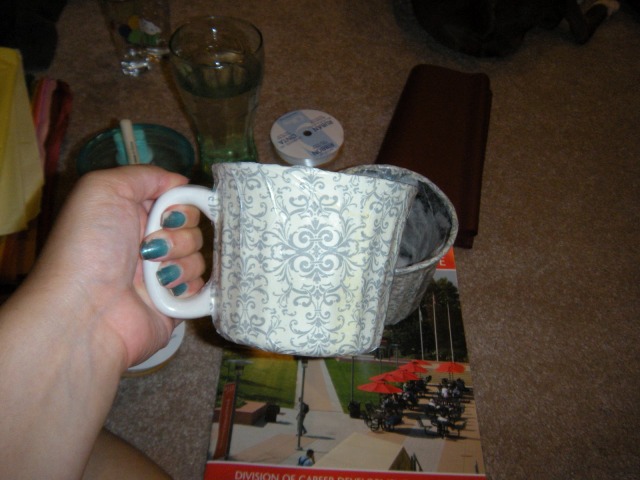
I then added one layer of the patterned tissue. This was really
tricky because of the grooves and shape of the mug. The mismatching of
the pattern isn’t too noticeable though in the end result.


I made sure to put the yellow and patterned paper all the way to the
bottom to make sure you could not see any part of the mug when it’s
placed down. Also, I made the yellow and patterned paper overlap the rim
of the mug because I was planning to cover it up anyway.
After I let it dry a bit, I made sure to go over the inside and
outside with the mod podge a few times to make sure it was sealed and
shiny (if left in the bathroom I didn’t want it getting ruined with
humidity or water).
I then began with the ribbon. I first hot glued the silver ribbon
along the inner rim of the mug to cover up the seam of the inside and
outside tissue paper.

I was originally going to leave it at that and then add the yellow
ribbon in the middle of the silver, but I decided to add another layer
of the silver right below the first one.

I then added the bright yellow ribbon in between the two silver ones.

I picked the bright yellow rather than a pastel because I thought it
needed a pop of color! I let it dry for a day or two and this is the
finished mug!


I forgot to mention that I left the handles without anything on them.
My sister saw me making them before I was done so I asked her advice on
it and she told me she would rather it be bare. I figured it was
probably for the best because it would be handled a lot (lol see what I
did there?) and I don’t know how good it would hold up.
I hope you guys have enjoyed this post! Let me know what else you’d
like to see and, if you tried this out I’d love to see pictures. I’m
sure you can add rhinestones or glitter, even tulle; anything that suits
your style! I have a few more posts to come.
One
of the most common irritants a teenager faces in her life is those
little red, black and white pustules which spring up on her face
overnight!!! The most dreaded eruption which sometimes leaves her
depressed and physically and psychologically scarred – The Pimple.
WHAT IS A PIMPLE?
A pimple is a red, raised skin blemish that usually contains pus. The most common cause of pimples is acne,
a skin disorder which occurs more commonly in teenagers. Acne is
generally caused by hormonal changes that occur at puberty. One of the
hormones released during this time is testosterone which stimulates the
oil gland, Sebaceous gland, found just beneath our skin
and close to the hair shaft. Dead skin and dirt on the surface of the
skin plugs off the hair shaft and oil keeps getting accumulated under
these plugs. A plugged pore causes a blemish which is called a blackhead
or a whitehead. Pimples are caused by the Acne Bacillus,
a type of germ which thrives in the accumulated oil. This germ makes
irritating substances from the oil causing redness and pus.
- See more at: http://readanddigest.com/how-to-get-rid-of-pimples/#sthash.3FqiInLQ.dpuf


0 comments:
Post a Comment